Calibration Tab
In The Workflow, a Calibration Tab is dedicated for that purpose. The user may want to create their own. Before you start please read the following documents:
- Human perception of display color versus actual color
- Understanding Calibration Process
- Understanding Calibration Modes
- Profiling vs. Calibration
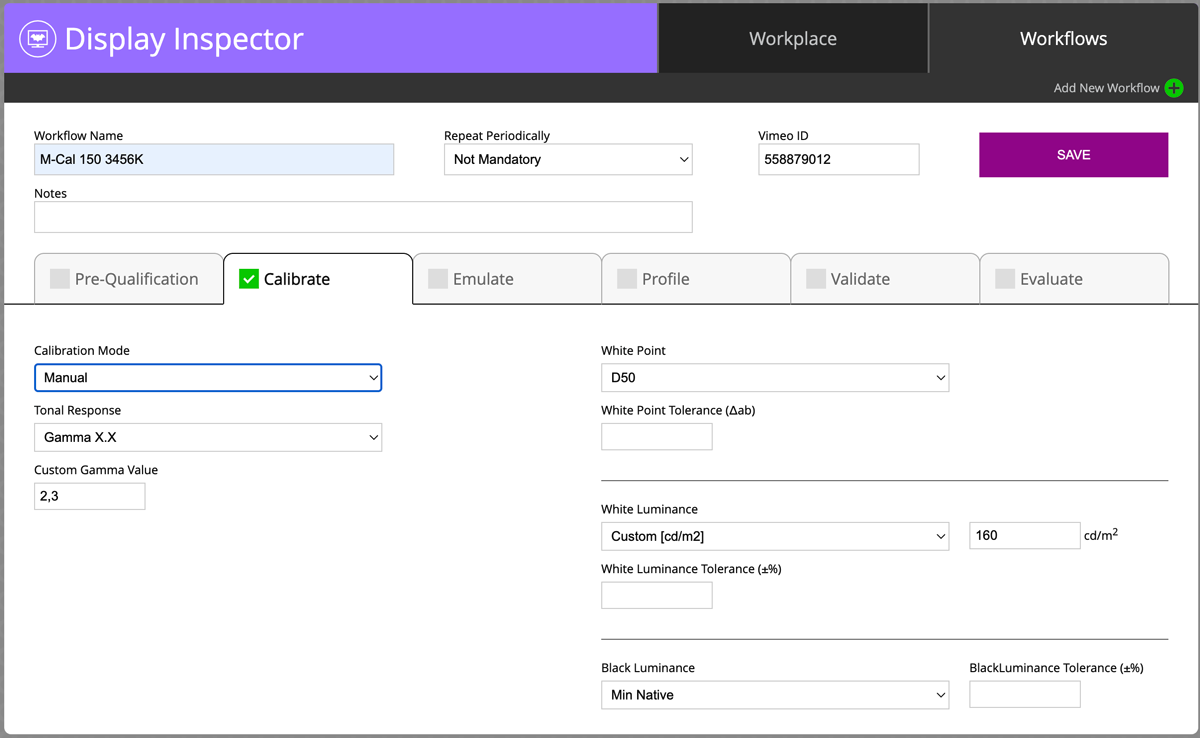
Calibration Mode
- Automatic (default)
- Auto Fast
- Manual
Please follow the instructions in the document Understanding Calibration Modes. Take into account that hardware-calibrated monitors can't use manual mode. Software calibrated Displays can use Automatic - but the user needs to be sure that Luminance ( Brightness is optimal).
Tonal Response
- L* (default)
- Gamma 1.8
- Gamma 2.2
- Gamma X.X (user-defined)
- HDTV (Rec.709)
- UHDTV ( Rec.2020)
- BT1886
- P3
We strongly advise following ChromaChecker's recommendation here. If you don't know use the default value.
White Point
- Monitor Native
- D50
- Custom D (range 20-90)
- Blackbody Temperature [°K]
- xy
- uv
- Emissive Measurement
- Ambient Measurement
We advise consulting mentioned before recommendations. If you need to specify White Point preciously take into account that only "xy" or "uv" options give two coordinates required to control the potential green-magenta cast.
Note also that to compensate personal observer requirements White Point has to be adopted to compensate visual differences
White Luminance (Brightness)
- Custom cd/m2
- Max
- Emissive Measurement
- Ambient Measurement
This value is also specified in mentioned recommendations.
The short principle is "luxes" in Viewing Booth divided by Π(3.14) should be equal to "cd/m2" on the screen.
Black Luminance
- Custom cd/m2
- Max Native
- Min Native
- Emissive Measurement
- Ambient Measurement
In short, we recommend Min Native Black - but if the user has two monitors with different Native Black value it might be recommended to use a higher value to get similar results
Contact ChromaChecker Support
Additional information and Support Form is available for logged users.