Print Industry »
Print Industry »
Working with Spot colors »
Options for setting exacting Tolerances »
Entering tolerance values in the system
April 6, 2022
Entering tolerance values in the system
On the printed sheet exclude patches that are not acceptable. Now - for the documentation right down values that represent boundaries of tolerance.
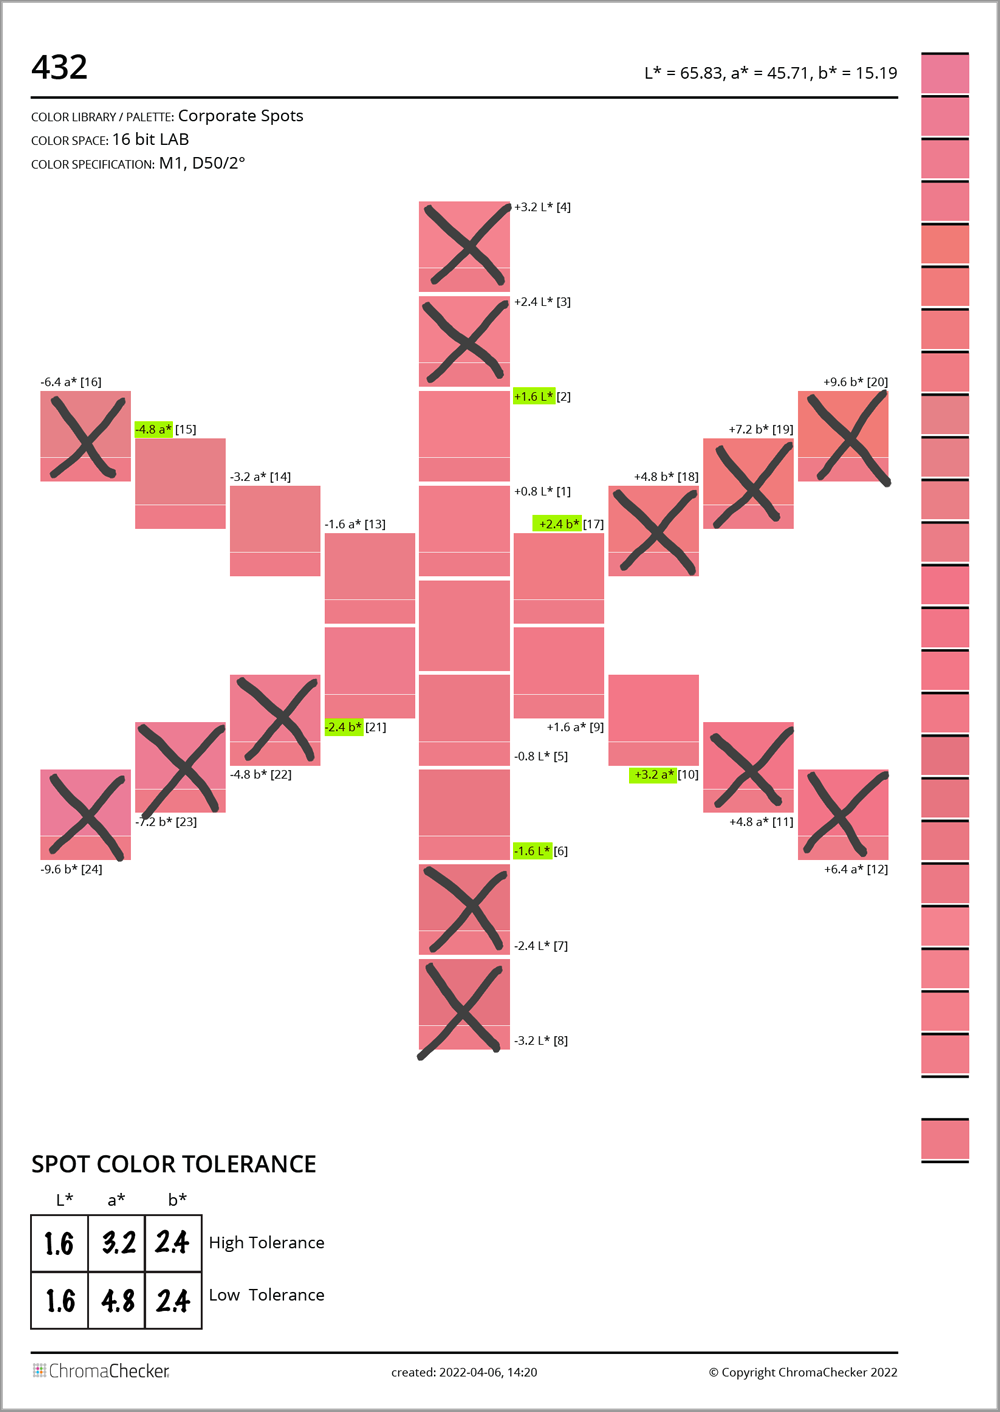
Values highlighted with a green marker define 6-axes snowflake tolerances.
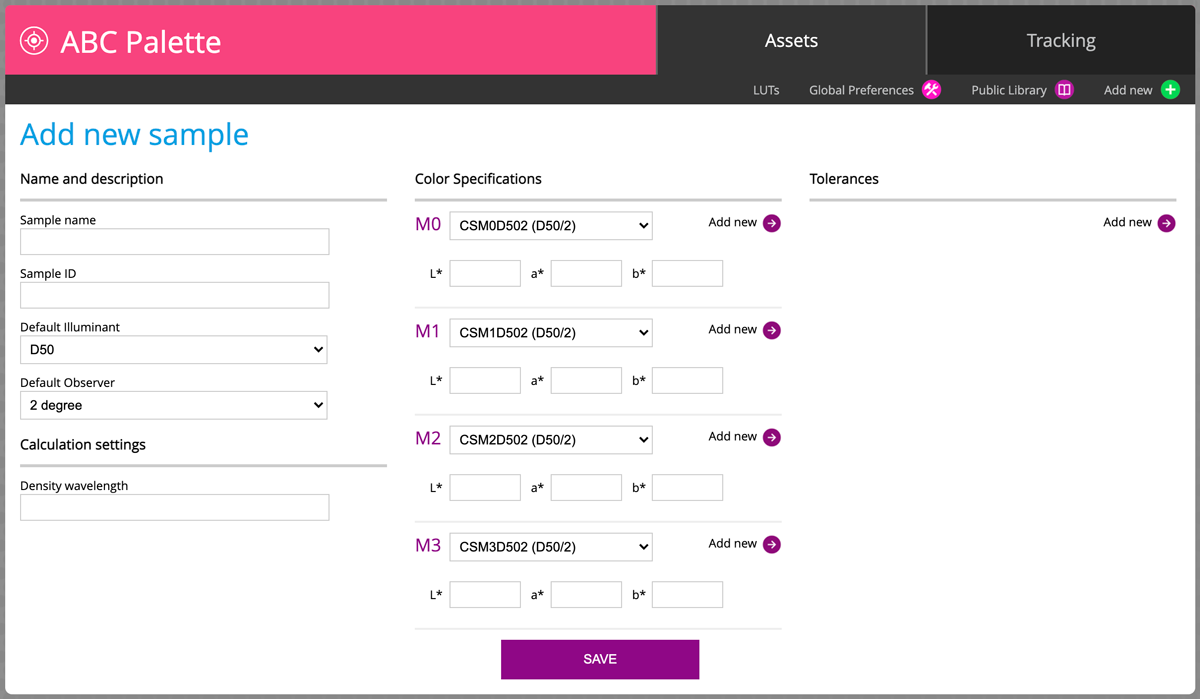
- Open Color sample in Color Library (Color Inspector assets)
- Find sample (432) and click on "Adit and Add Tolerance Set"

- In Tolerances section click on "Add New"
- In Function select "∆L*, ∆a*, ∆b* (Snowflake)" and enter values
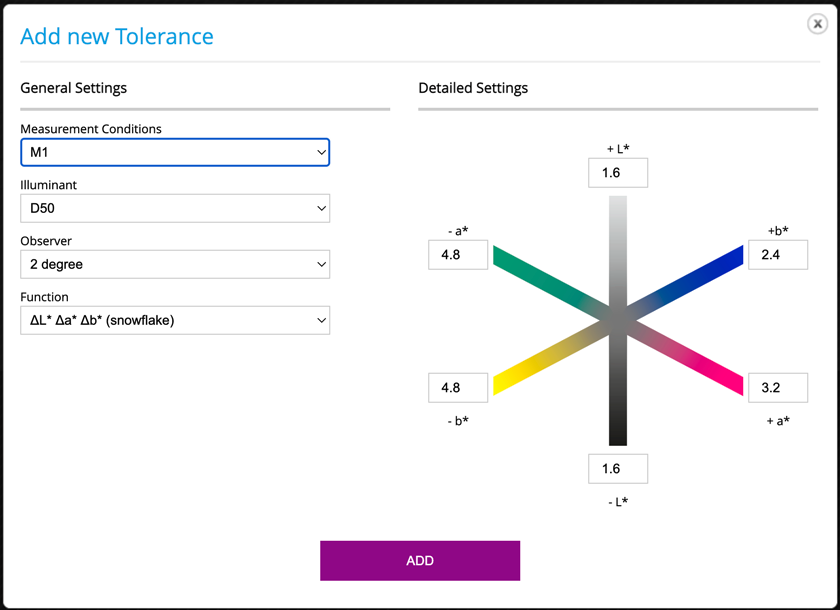
- Save! Now the Tolerance Edit window will display:
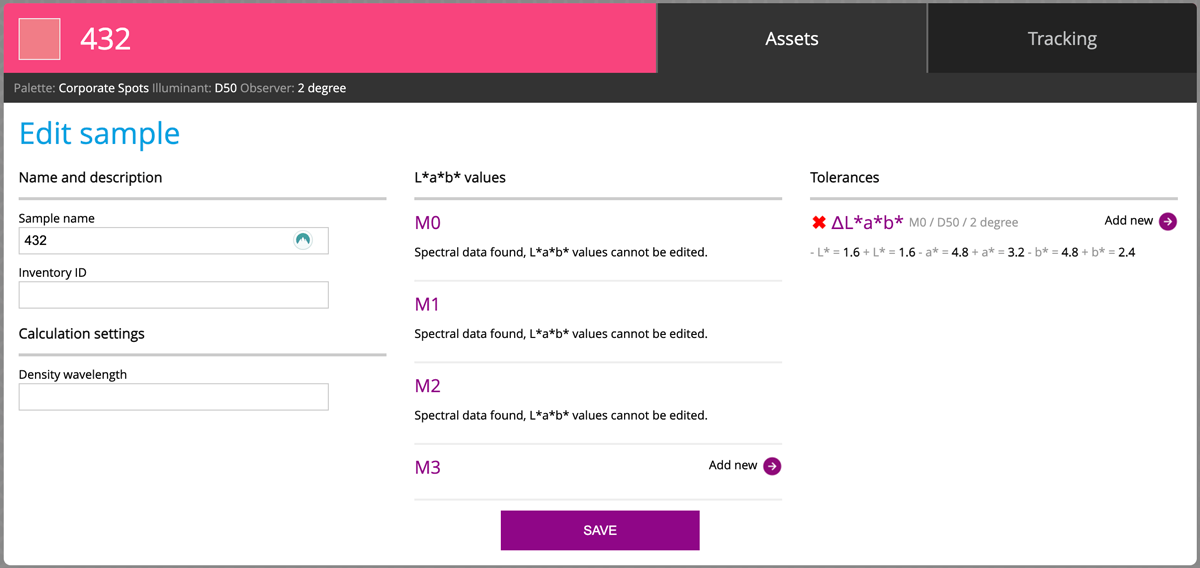
and Sample Report has new section: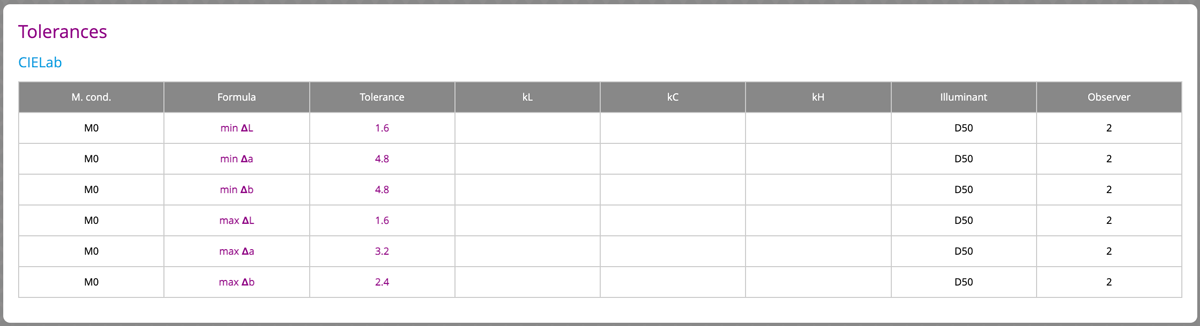
ChromaChecker Color Inspector Libraries offer advanced tolerances, specific for each color sample.
Contact ChromaChecker Support
Additional information and Support Form is available for logged users.