Step 3 — Measure & Save Results
Connect your instrument in CC Capture, measure spot colors, and save measurements for reporting and tracking.
Connect Your Instrument
Open the CC Capture desktop application and log in with your ChromaChecker credentials. At the first launch you will be prompted to connect your instrument.
Don't have CC Capture installed yet? Download it first:
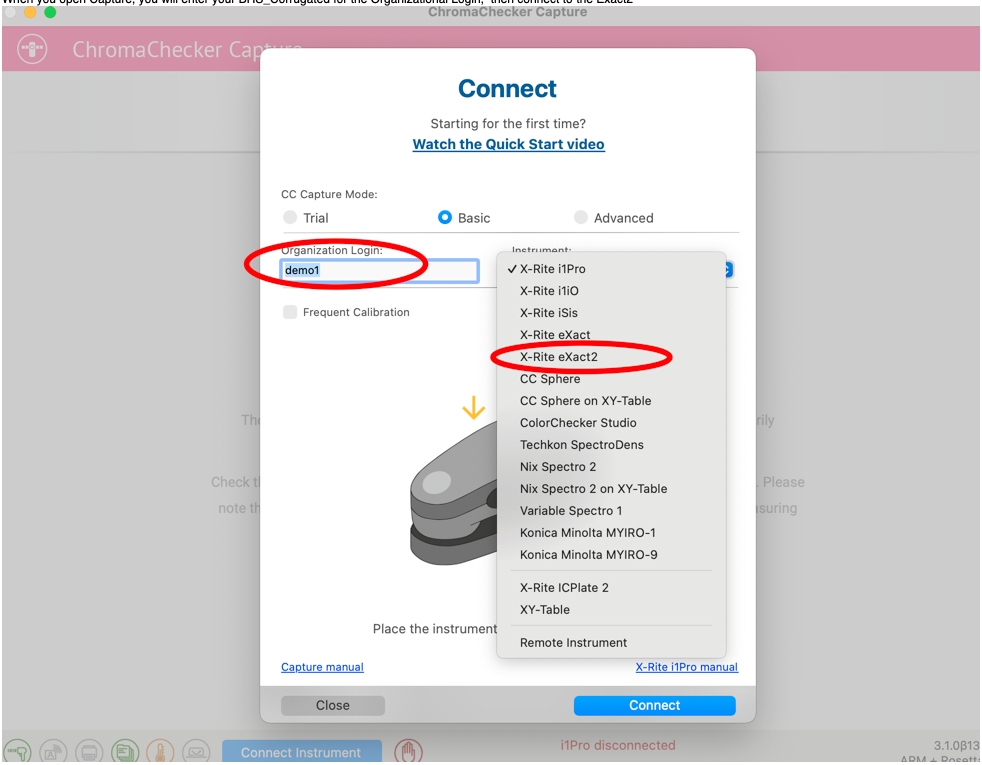
- In the Connect dialog, enter your Organization Login (the same account used for ChromaChecker web).
- Select your instrument from the dropdown. In this example: X-Rite eXact2.
- Click Connect. The instrument status bar at the bottom will show the connection state.
Log In to CC Capture
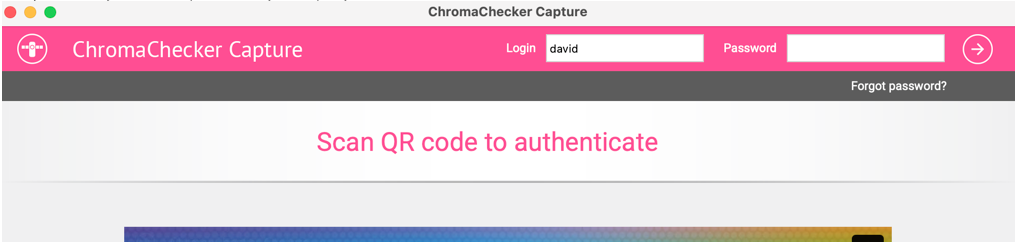
After connecting the instrument, enter your login and password, or scan the QR code shown on screen to authenticate with your ChromaChecker account.
Select Source of Reference
In the QuickChecker interface, locate the Source of Reference selector (#2 in the screenshot below). Change it from the default (Scratchpad) to Projects to compare measurements against your project’s color standards.
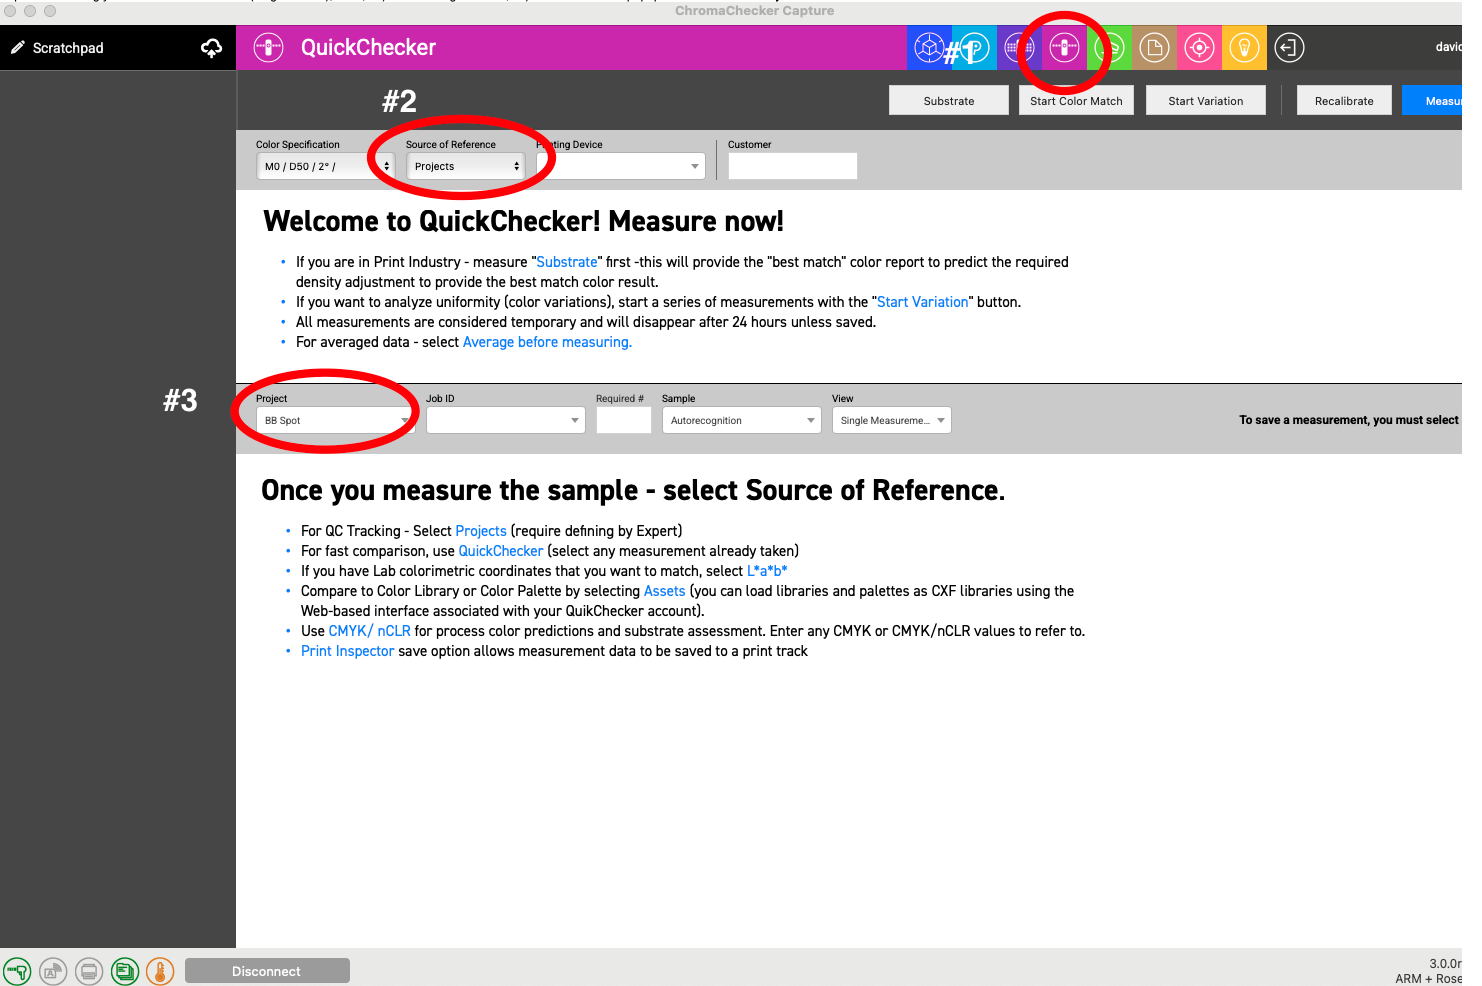
Select the project you configured in Step 2 (e.g. BB Spot) from the Project dropdown that appears. The QuickChecker will now evaluate every measurement against the color standards and tolerances in that project.
Measure and Read Results
Place your instrument on the spot color you want to evaluate and press Measure (or trigger measurement from the instrument itself). The result appears immediately.
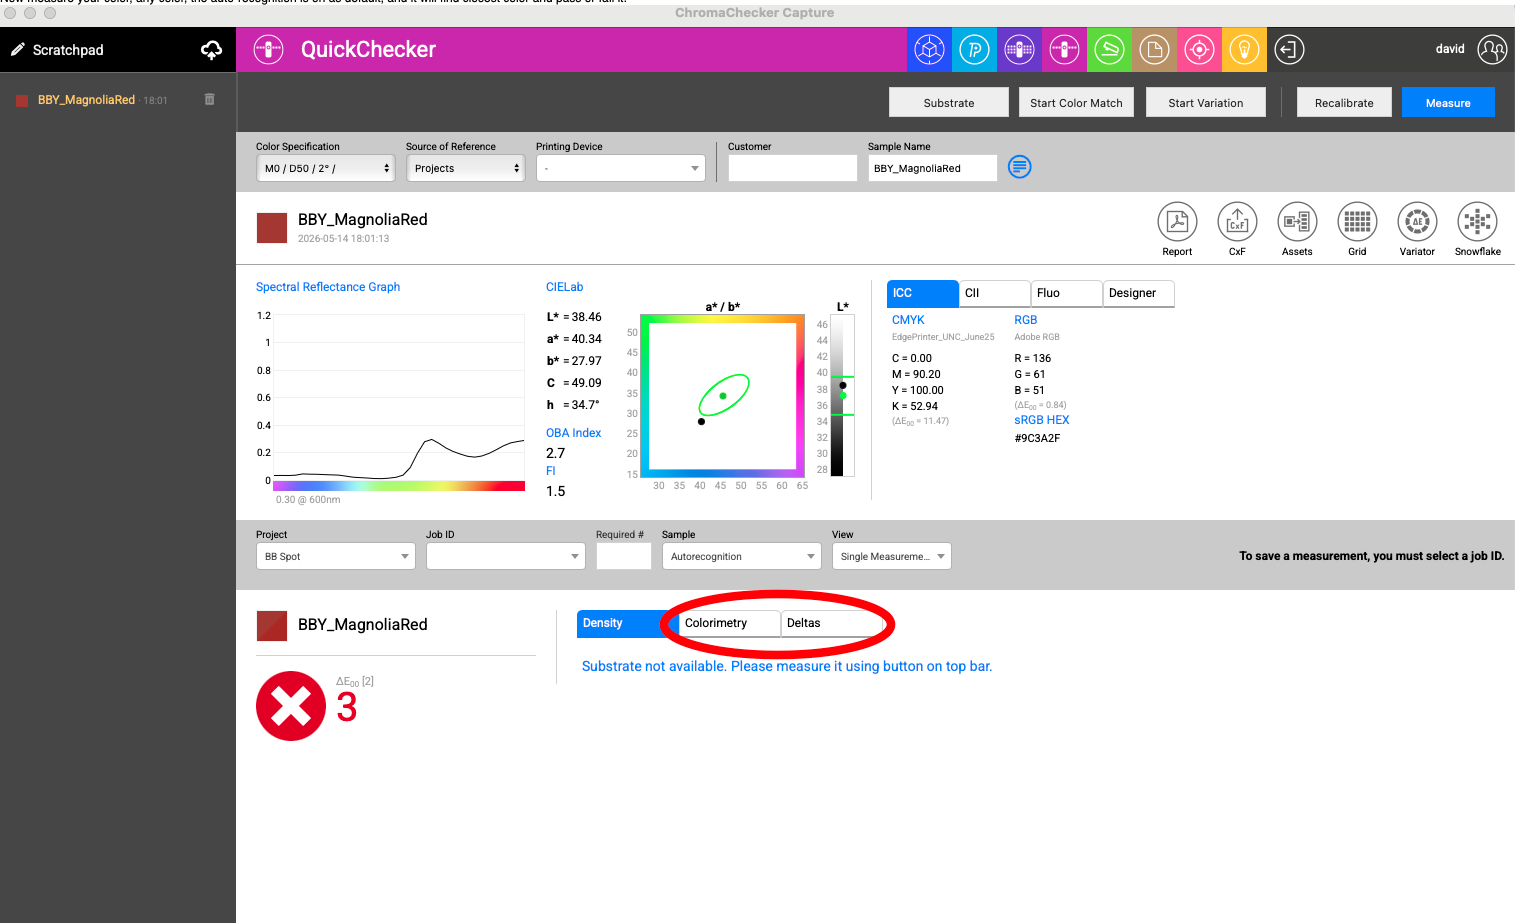
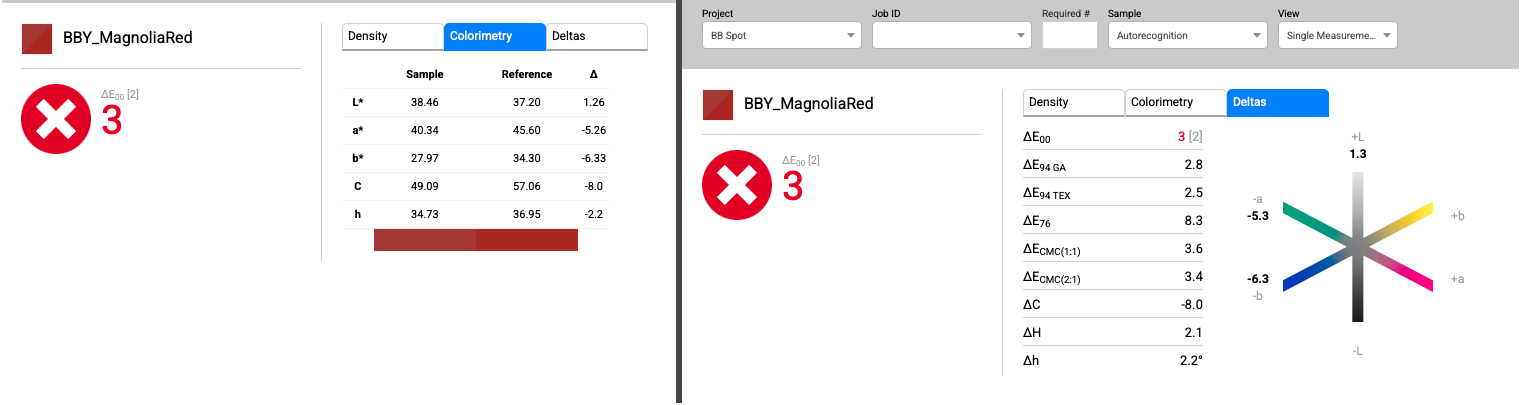
The result panel shows three tabs:
- Density — Ink density values
- Colorimetry — L*, a*, b*, C, h values for Sample vs. Reference with delta columns
- Deltas — Multiple ΔE formulas: ΔE₀₀, ΔE₉₄ GA, ΔE₉₄ TEX, ΔE₇₆, ΔECMC(1:1), ΔECMC(2:1), plus ΔC, ΔH, Δh
The large icon on the left shows Pass (green checkmark) or Fail (red X) based on the project tolerance. In this example, BBY_MagnoliaRed scored ΔE₀₀ = 3, which exceeds the 3.00 threshold and shows as Fail.
Save the Measurement
To save a measurement to tracking history, enter a Job ID in the selector bar above the result panel, then click Save.
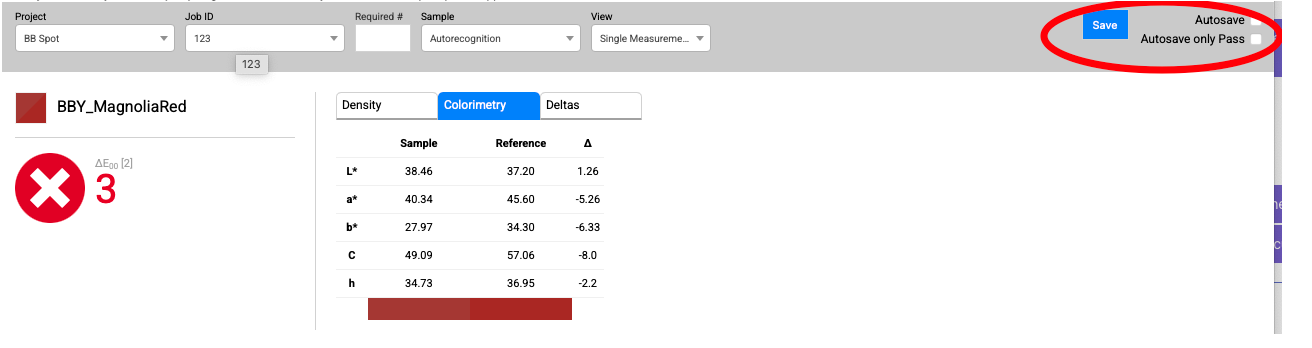
Two save options are available:
- Save — manually save the current measurement with the entered Job ID.
- Autosave — automatically saves every measurement as soon as it is taken.
- Autosave only Pass — saves only measurements that pass the tolerance threshold.
Workflow Complete
You have completed the full Spot Color Verification workflow. Your measurements are now stored in ChromaChecker and can be reviewed in the Print Inspector, exported as reports, or compared over time to demonstrate color consistency to your clients.