ΔE Variator
Visualize how ΔE tolerance looks across 42 directions of color space.
Overview
Variator is available from the ChromaChecker Capture interface or from the Operator interface from the Cloud Login. Cloud login provides more flexibility.
The Purpose of Using the ΔE Variator Feature
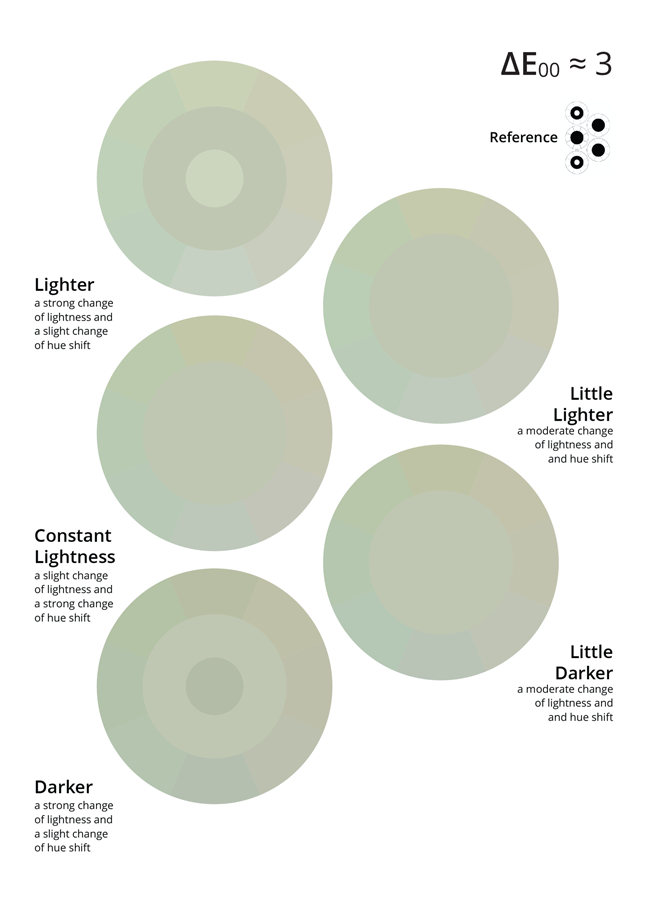
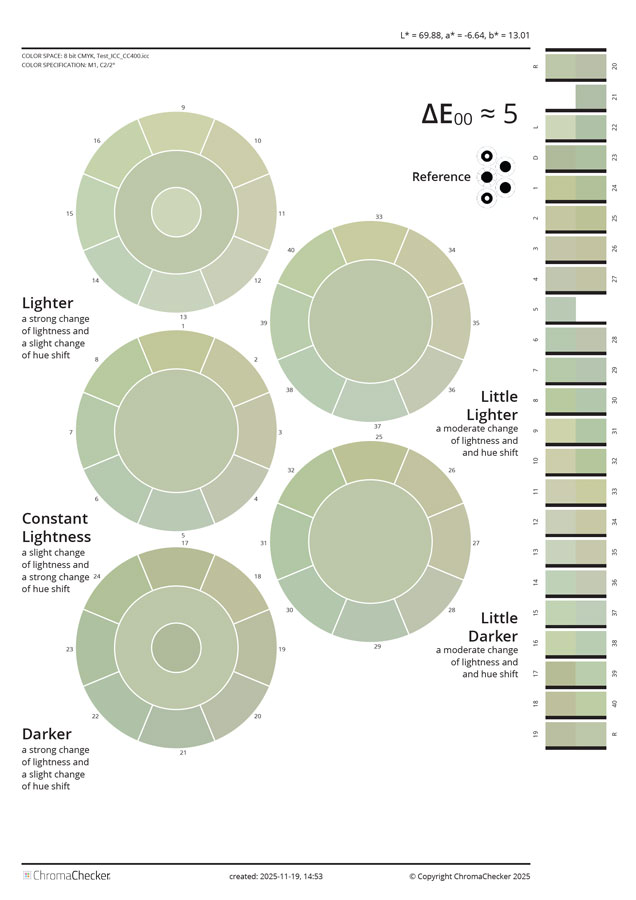
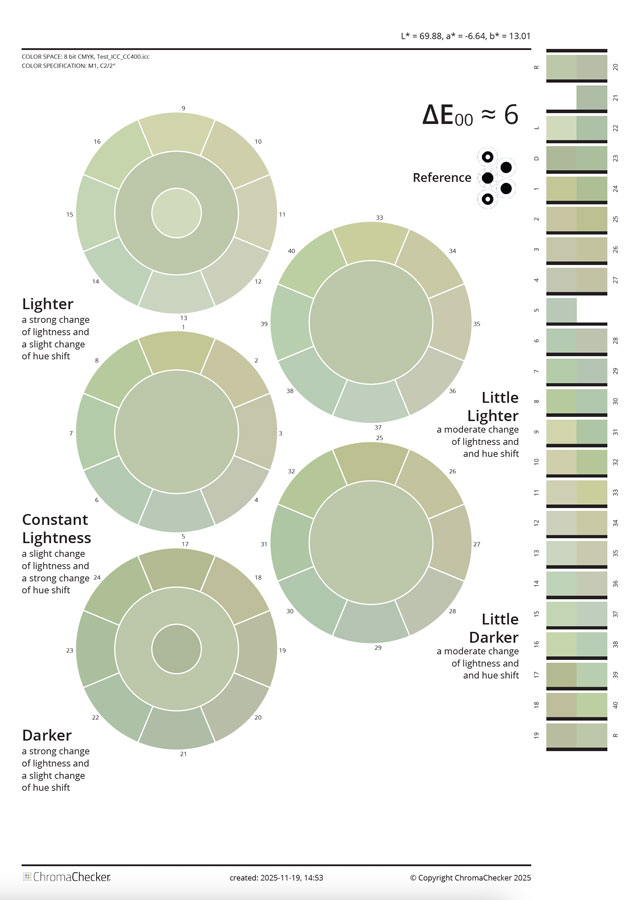
The most commonly used tolerance currently is based on the ΔE 2000 formula. Although it was created as a response to criticism of earlier formulas, the problem of the lack of correlation between the digits and the observer’s impression remains. The ΔE variator is a unique tool that illustrates how the determined value for a selected sample will appear when the difference is caused by a shift in Lab space in various directions. The chosen method shows changes as rings with eight segments. The directions correspond to the a* and b* axes, and subsequent layers represent different L* values. This unique tool allows us to visually see samples that differ from the reference in all 42 key directions of the color space. Typically, we observe that changes in tone (a* and b* axes) are less critical than changes in lightness (L*). By adopting a specific tolerance for a given color, we assume it applies to all possible variations of that difference. This can sometimes lead to costly or even unrealistic narrowing of tolerances. Therefore, when defining a color standard, we must not only construct a spectral color definition but also define the tolerance. A Snowflake tolerance may be worth considering.
Understand ΔE Variator Parameters
PDF Color Space
The created file may address graphic objects using various color spaces, such as Lab, CMYK, or RGB. This requires understanding the details of your production workflow. If you are using an inexpensive SOHO printer, it is probably using a generic system driver that uses the RGB color space. If you have a printer with a RIP (for example, an Xerox MFP with EFI Fiery, an Epson proofer controlled by the RIP, or a Konica Minolta KM-1e Press), it is mostly CMYK.
Device ICC Profile (CMYK and RGB spaces only)
Please select the ICC profile for your printing device.
LUT (for selected ICC Profile)
Select the LUT that is already created. There are two options the user can create a custom LUT — one designed for single samples, when iteration in a single step is focused on one selected sample, available as an option in QuickChecker; or for more samples (whole library or palette), iterated using the dedicated Scan Color Match tool (designed for use with XY scanning instruments). LUT must be correlated with the ICC Profile and cannot be transferred to another one.
Color Depth
If your system can handle 16-bit — use it for more accurate addressing. Inexpensive solutions are often 8-bit only, while more advanced ones can use deeper color definition.
ΔE Formula
Options to select from: ΔE 2000, ΔE 1994, ΔE 1994 (textile), ΔE 1976, ΔE CMC (1:1), ΔE CMC (2:1).
ΔE Value
Enter here the desired value — range will create variants around this value (lower and higher values).
ΔE Step
Single step for variants. Typically, this is 0.5 or 1.0.
Range
Defines how many additional values below and above the “ΔE Value” will be created.
Media Size
This defines the media size of the PDF.
Outline Option
It’s essential to understand how humans perceive color differences. Vision is relative, and whether samples are connected or separated is perceived differently by the brain. This option allows you to introduce a separation line and compare the impressions of the two variants. This is an essential element, and we recommend experimenting with this option.
Control Strip Option
Placing a control bar will enable automated measurement and verification of how precisely the output device renders the values specified in the PDF.
Reference
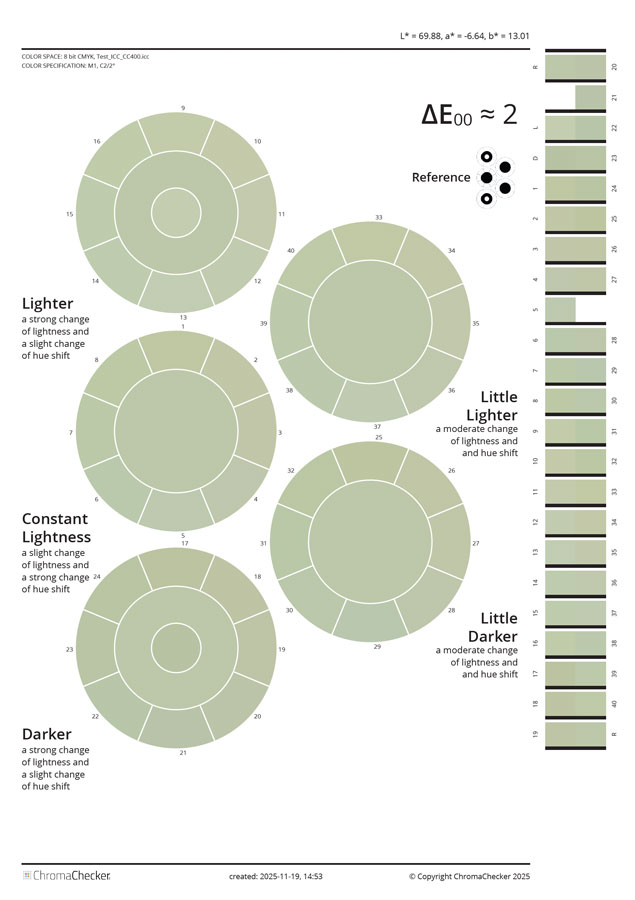
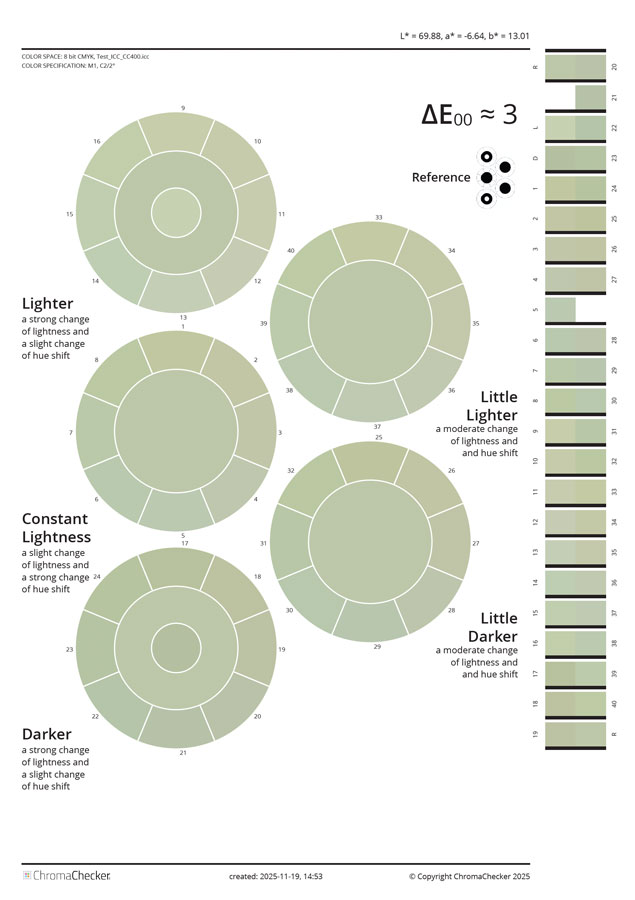
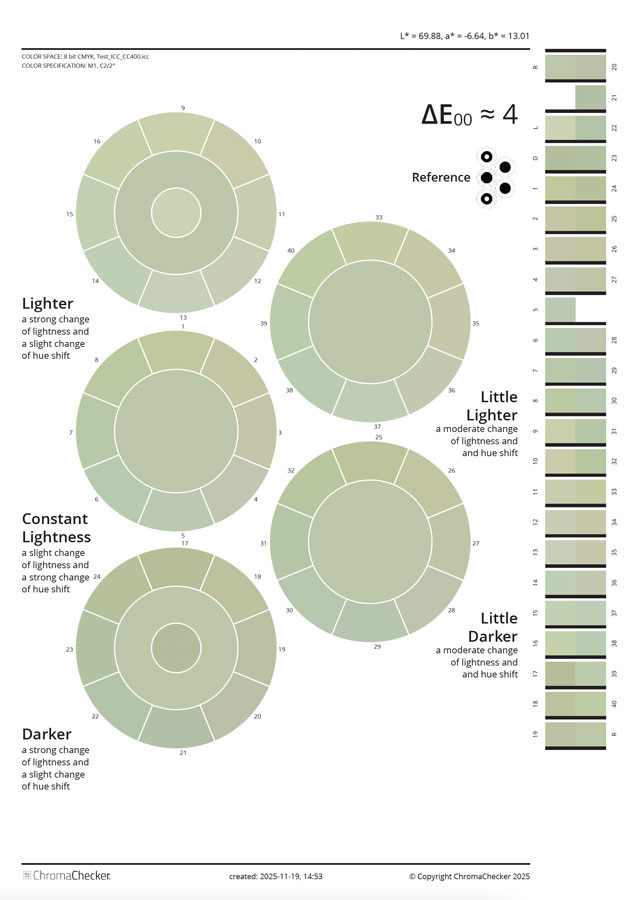
The following diagram shows all locations of the reference sample, enabling direct comparison of all 42 variants.
Example
Range ±2 means that seven pages will be generated in 1.0 ΔE step with 4.0 ΔE value in the middle.
Checkboxes “Outline” and “Control Strip” are selected.
Compare Personal Perception With and Without Separation Lines
Without separation lines, it is harder to see segments.